Dunning Procedures Configuration
Step 1: Access the transaction by using one the following navigation method
SPRO > IMG > Financial Accounting (new) > Account receivable and Account payable > Business transactions > Dunning > Dunning procedure > Define Dunning Procedures.
Transaction code: FBMP

Step 2: Click on “New procedure” to define new dunning procedure

Enter the following data.
- Dunning procedure: Enter any four code
- Name: Dunning procedure for customers
- Dunning interval in days: 7 (You can maintain maximum 9)
- Number of dunning levels: 4
- Line item grace period: 3 days
- Interest indicator: Update appropriate interest calculation indicator
- Activate the standard transaction dunning check box.
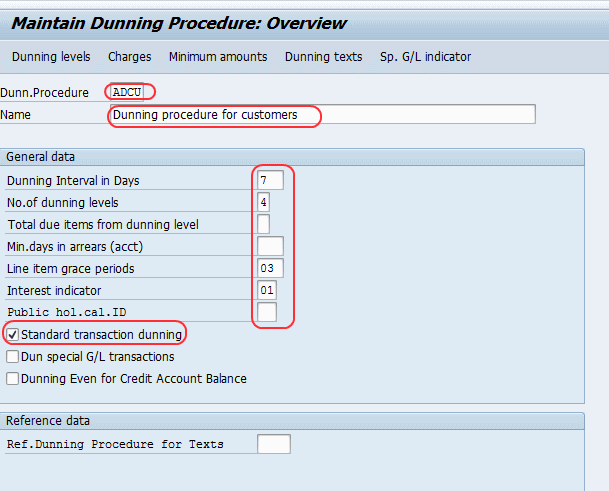
Press two times enter key and ignore the warning message
Step 3: Select Dunning texts button

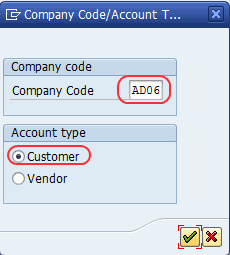
Update company code and select customer radio button.
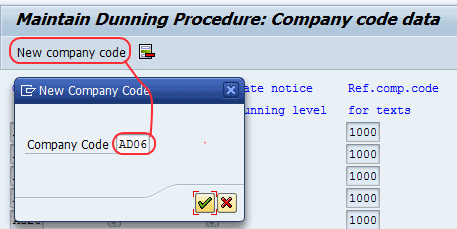
Select new company code button and update company code and press enter.
Select separate notice per dunning level check box.

Go back (F3) and select Yes button for the message to save the date.
Step 4: Click on dunning levels button and select check box always dun for all the four levels.
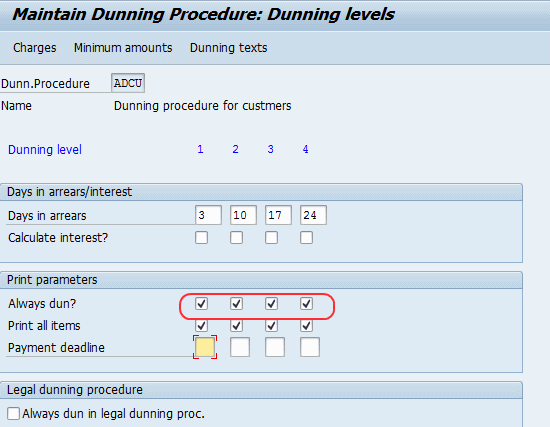
Step 5: Select charges button (F6) and update the currency key.

On the “Maintain Dunning Procedure: charges” screen, maintain dunning level and dunning charges
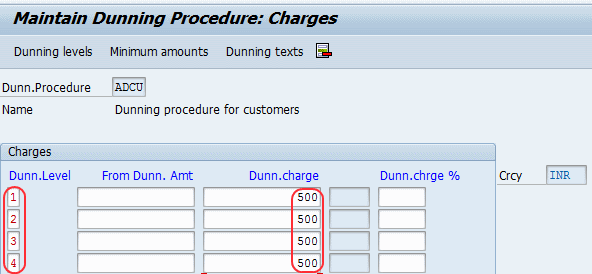
Select dunning texts and update the Form that Specifies which is to be displayed for the dunning level.

Go back (F3), ignore warning messag and click on save button to save the configured data.
Step 6: Assign dunning procedure in customer master
Accounting > Financial accounting > Accounts receivable > Master records > Maintain centrally > Change
Transaction code: XD02
Enter Customer code and company code

Select company code data and then select correspondence tab
Update dunning procedure key to assign dunning procedure for customers master data
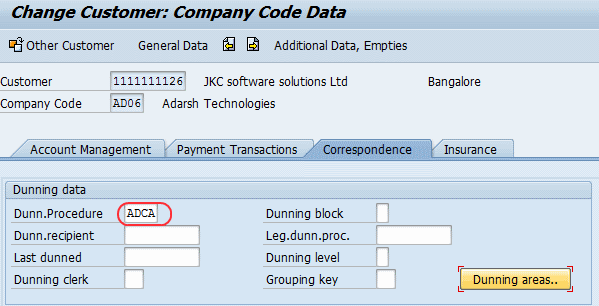
After assigning, click on save button to save the data.

Leave A Comment?
You must be logged in to post a comment.